Monday, September 24, 2012

Finished Art Journal and EASY Junk-y Journal

YIPPEE! I've finished my re-purposed Ikea catalogue Journal. It held up pretty well and I loved working in this smaller format.(click on pics for larger view)
** A personal rant about paint chips*** I was lucky enough to find a huge bound stack(provided to a store by the paint company) at the Salvation Army for 2.00. Otherwise, I personally would NOT take paint chips from stores that sell paint unless I was buying paint. It just doesn't seem honest to me to go empty out the rack of chips intended for paint customers. Just my opinion.

Here are some of my favorite pages.


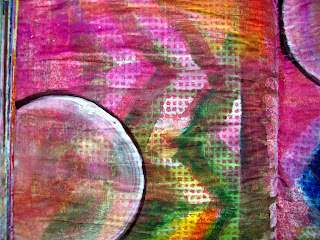
LOTS of layers on this page and used spray inks thru shapes cut from Plastic needlepoint canvas.


I'm a miserable draw-er. This woman is cut from a magazine, covered with a thin coat of gesso and recolored using watercolor.

I LOVE using images from old books.


I have always struggled with journaling in my Art Journals. I'm an AVID reader and decided to journal about books I've read and I LOVE it! It helps me pause and think about a book and what I liked/didn't like about it.

Junk-y Journal


Here's my version of the Smash-Junk-Daily Journals so popular right now. I found a cool shaped Childeren's Board book at the Salvation Army for .50 cents, cut the pages apart with and exacto knife, glued 2 together for extra strength with Scotch Quick Dry glue. Then I covered it with Scrapbook paper, punched holes and used binder rings. For the pager I used old magazine ads, maps, index cards and scrapbook paper. I will embellish the pager as I journal.


Thanks SO much for looking. I LOVE comments and /or links to similar things you have tried.


Tuesday, September 18, 2012

Some New Cards

I continue to work in my Art Journal and will post some pics soon.  But I wanted to post a pic of a card I'm entering in my 1st challenge at Simon Says Stamp.

It's a chevron design I paper pieced along with book text. Wish me luck :)

I am definitely a Clean and Simple card maker and like a sort of eclectic style.

This is a La Blanche stamp. If you haven't tried them, you should. I really love how well they stamp and their old world designs. I used my Prismacolor Colored pencils and really love how they resist the Distress Inks.


Tuesday, May 29, 2012

Best Friends

Life can sometimes be hard but I am committed to trying to find the good in all things.

Punkin is my 10 year old "son". He is NOT nor has he EVER been a lap cat.....that is until my Dad came along.
And since Dad has started Chemo, Punkin has stepped up his game, trying to cheer Dad up and take care of him.

My Dad is a Cowboy and a man of few words. The other day he said, "I love you and everything but I don't know what I'd do without this cat."
Some New Cards

I just LOVE Red and Black and White together.


Experimenting with stamping on patterned paper. I like the butterflies on the tiny pattern.

Sunday, February 5, 2012

2 Awesome Embellishments you can make

Being unemployed I have to art on the cheap using what I already have. No complaints tho as I have to think a little more creatively. I have recently discovered Jennings644 on Youtube and LOVE her creative ways to make things yourself... "Come on Ladies, you don't have to go buy it, you can do it yourself". She is sooo supportive and giving of herself. A real treasure :)
So along those lines I decided to use the watercolored book pages as seen in an earlier post in a different way.  I found this video and adapted it a bit...
As you can tell, I'm a bright color lover. But these flowers can be done with pastel colors, sprays, stenciling (purple on using Punchinella) and of course you could distress the edges etc.
I happen to like the matte watercolor look and find it easier to watercolor the page while still in the book as opposed to after it's cut.

If you don't feel like watching the video...her's a basic step by step...
The second embellishment is a sort of collage look tile. First I drew my grid lines. These are 1 1/4". I used rubber stamps and archival black in to stamp heavy weight chipboard. I like the look of the chipboard background but I'm sure you could color it 1st if you prefer.

Then I used Prismacolor colored pencils to color the images and a bit of the background. I then covered the tile with a medium coat of Crackle Accents by Ranger. Once the Crackle Accents was dry, I used Vintage photo Distress Ink and an cosmetic sponge to sponge the edges and rub some into the cracks.
I am NOT completely crazy about Crackle Accents. I'm sure it's me but I never get consistent results. If anyone has any suggestions, I sure would appreciate it!!
I really like these and use them on cards and in Mini Books.

Chalk Technique on "The Cheap"

As a new card maker I'm trying out all the different techniques I can get my hands on.  I didn't want to invest in a set of chalks in case I didn't like the result sooooooo... I noticed some bright color eyeshadow palettes at the Dollar store and wondered if it would work.
 I used them to color in a stamped image using one of those pointy cotton swabs for make up application.. I like it and the slight shimmer is really pretty.
I have also tried the eyeshadows with the Versamark stamped image technique with good results. It seems  less absorbent paper is best so the Versamark sits on top and you get a more detailed image. Also I have found that it's best to tap the "chalk" onto the Versamark stamped image or it will smear. 

Saturday, January 7, 2012

Cards and Art journaling from 2011

Just realized today that I had taken a bunch of 2011 pictures and not posted them!
First some Art Journaling pages. I've been trying to photograph them before I do my personal journaling on them.
Some painter's tape with paint on it left over from another page.
The backgrounds are my new favorite vivid color tool- Color Slicks by Crayola. They're water soluble before they dry.
In honor of my friend Kerri. I just find squirrels incredibly funny!
The hearts in this pages are a foam stamp made from diecut foam from my friend Laurel :). The rays type stencil is the center of a plastic paper plate holder from the thrift store. And 1st time using my homemade spray inks.

Next some cards...

As you can tell I've kind of gone "Embossing" CRAZY. I'm a beginner card maker and still trying out all the techniques :)